
How to Automate Your WordPress Forms with Zapier (Beginner Workflows)

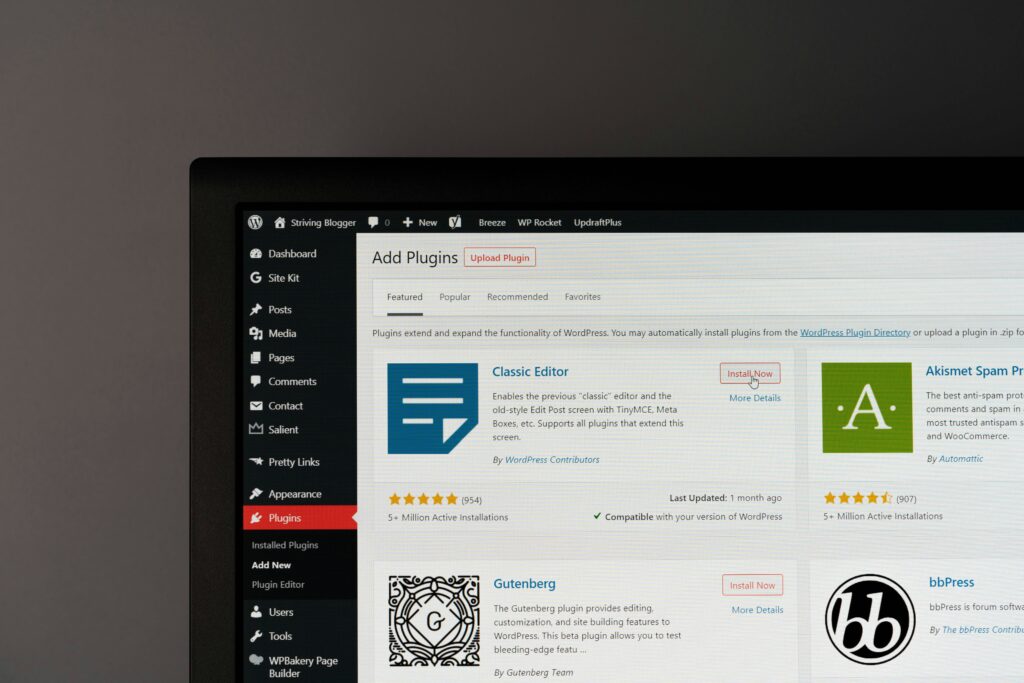
So, you’ve got a WordPress site and you’re using forms, which is great! Forms are awesome for grabbing information from your visitors. But what happens after someone hits submit? If you’re manually copy-pasting data or just letting it sit in your WordPress database, you’re probably missing out on a ton of efficiency. This is where automation comes in, and Zapier is your friendly neighborhood connector for making it happen. Essentially, you can use Zapier to take the data from your WordPress forms and send it directly to other apps you use, saving you time and a whole lot of clicking. Think of it like this: someone fills out your form, and Zapier automatically does the next step for you, without you lifting a finger.
Before we dive into the “how,” let’s quickly cover the “what.” Zapier is a web-based service that lets you connect different apps and automate workflows between them. It works on a “trigger” and “action” system. A trigger is an event that happens in one app (like a new form submission), and an action is what Zapier does in another app as a result (like adding that person to your email list). You don’t need to be a coding wizard to use it, either. It’s all done through a visual interface.
The Trigger: Your WordPress Form Submission
The magic starts with your WordPress form. When someone fills it out and clicks “submit,” that’s the trigger for Zapier. Your WordPress form plugin is going to send that data somewhere. Zapier acts as the middleman, or rather, the ears listening for that specific event.
The Action: Sending Data Where You Need It
Once Zapier “hears” the submission, it can perform a pre-defined action. This could be anything from adding the person’s email to your Mailchimp list, creating a new row in a Google Sheet, sending a notification to your team in Slack, or even creating a new customer in your CRM. The possibilities are pretty extensive.
No Coding Required, Seriously
This is a big one. You don’t need to write a single line of code. Zapier has built-in integrations with thousands of popular apps, including virtually every WordPress form plugin worth its salt. You’ll be connecting apps by selecting them from a dropdown menu and mapping the fields from your form to the fields in the target app.
If you’re looking to streamline your WordPress forms even further, you might find the article on Integrating WordPress with Other Applications particularly helpful. This resource delves into various methods of connecting your WordPress site with other platforms, enhancing your automation capabilities beyond just forms. By exploring these integrations, you can create a more efficient workflow that saves time and improves user experience.
Getting Started with Zapier and Your WordPress Forms
Okay, let’s get down to business. To use Zapier with your WordPress forms, you’ll need a few things in place.
1. Choose Your WordPress Form Plugin
You’re likely already using a WordPress form plugin. If not, popular choices include:
- WPForms: Known for its drag-and-drop builder and user-friendliness.
- Gravity Forms: A powerful, developer-friendly option with tons of add-ons.
- Ninja Forms: Flexible and extensible, often used for more complex needs.
- Contact Form 7: A free, basic option that’s very popular.
The good news is that Zapier integrates with most of these. The setup process might vary slightly depending on your plugin, but the core concepts remain the same.
If you’re looking to enhance your WordPress forms even further, you might find it beneficial to explore the capabilities of multi-step forms. A related article that delves into this topic is available at Multi-Step Addon for WPForms, which provides insights on how to create more engaging and user-friendly forms by breaking them into manageable steps. This can significantly improve user experience and increase form completion rates, making it a great complement to your automation efforts with Zapier.
2. Set Up Your Zapier Account
You’ll need a Zapier account. They offer a free tier that’s great for trying things out and for simple, low-volume workflows. As your needs grow, you can upgrade to paid plans for more features and higher task limits.
- Sign up for a free account: Head over to Zapier’s website and create your account.
- Explore the App Directory: Get a feel for the apps you can connect. You’ll see your WordPress form plugin listed there.
3. Connect Your WordPress Form Plugin to Zapier
This is usually the most straightforward part.
Finding the Zapier Integration for Your Plugin
Most popular form plugins have dedicated integrations with Zapier.
- Within your plugin’s settings: Look for an “Integrations” or “Zapier” section in your form plugin’s dashboard. This is often where you’ll find instructions or direct links to set up the connection.
- On Zapier’s App Directory: Search for your form plugin on Zapier. It will provide a step-by-step guide on how to connect it.
Authenticating Your Connection
When you set up the connection between your form plugin and Zapier, you’ll need to authenticate it. This means proving to Zapier that you have permission to access your WordPress site or your form plugin’s data.
- API Keys or Webhooks: Some plugins might use API keys, while others use webhooks. Webhooks are generally preferred as they push data immediately. Your form plugin’s documentation or Zapier’s integration guide will tell you which method to use.
- Following the On-Screen Prompts: Zapier is good at guiding you through this. You’ll usually be asked to log into your WordPress site (or wherever your form data is managed) to grant Zapier permission.
Building Your First “Zap”: A Simple Contact Form to Email List Workflow

Let’s walk through a classic beginner workflow: taking new contact form submissions and adding them to your email marketing service.
Step 1: Create a New Zap
Once you’re logged into Zapier, you’ll find a prominent “Create Zap” button. Click it.
Step 2: Set Up the Trigger: WordPress Form Submission
This is where you tell Zapier what event should start the automation.
Choosing Your Trigger App
- Search for your form plugin: Type the name of your WordPress form plugin (e.g., WPForms, Gravity Forms) into the “Choose app & event” search bar.
- Select the trigger event: For this workflow, the trigger event will most likely be something like “New Form Submission,” “New Entry,” or “New Submission.” Select the option that best matches your plugin.
Connecting Your WordPress Account to Zapier
This is the authentication step we discussed earlier. Zapier will guide you through connecting your specific form plugin. You might need to provide your website URL, an API key, or configure a webhook in your WordPress form plugin’s settings. Follow the instructions carefully.
Testing Your Trigger
This is a crucial step. Zapier needs to see a sample of your form data to understand what kind of information it’s receiving.
- Make a Test Submission: Go to your WordPress site and fill out your contact form with some test data. Submit it.
- Pull in Sample Data: Back in Zapier, you’ll be prompted to “Test trigger.” Click this. Zapier will attempt to pull in the data from your most recent submission. If successful, you’ll see the fields and values from your test submission. If it fails, double-check your connection and try again.
Step 3: Set Up the Action: Add to Email List
Now, tell Zapier what to do with that form data. For this example, we’ll use an email marketing service like Mailchimp.
Choosing Your Action App
- Search for your email service: Type the name of your email marketing platform (e.g., Mailchimp, ConvertKit, ActiveCampaign) into the “Choose app & event” search bar.
- Select the action event: The action event will typically be something like “Add/Update Subscriber,” “Create Contact,” or “Add Member to List.”
Connecting Your Email Service to Zapier
Similar to connecting your WordPress form, you’ll need to authenticate your email marketing account.
- API Keys or OAuth: Most services use API keys or an OAuth process where you log into your email service account through Zapier to grant permission.
- Follow the Prompts: Zapier will guide you through this process.
Mapping Your Form Fields to Your Email Service Fields
This is the core of the automation. You’re telling Zapier which piece of data from your form should go into which field in your email service.
- Select the List/Audience: Choose the specific list or audience within your email marketing service where you want to add subscribers.
- Match Fields: You’ll see dropdowns for each field in your email service (e.g., Email Address, First Name, Last Name). Click on each dropdown and select the corresponding field from your WordPress form submission. For instance, you’d map your form’s “Email” field to your email service’s “Email Address” field.
- What to do with duplicates: Your email service will usually have an option for what to do if the email address already exists (e.g., update the subscriber, do nothing).
Testing Your Action
Before turning your Zap on, it’s wise to test the action.
- Use Sample Data: Zapier will often pre-fill fields with data from your trigger test. Review these to ensure they’re correct.
- “Test & Continue” or “Test & Turn On”: Click the relevant button. Zapier will attempt to add the test subscriber to your email list.
- Verify in Your Email Service: Go to your email marketing platform and check if the test subscriber was added correctly.
Step 4: Turn On Your Zap!
Once you’re happy with the trigger and action tests, it’s time to go live.
- Name Your Zap: Give your Zap a descriptive name (e.g., “WPForms to Mailchimp Contact List”).
- Toggle the Switch: Find the “On/Off” switch for your Zap and turn it on.
Now, every time someone submits your contact form, their details will be automatically added to your chosen email list. Pretty neat, right?
Beyond the Basics: Automating More Complex Workflows

Once you’ve mastered the simple contact form to email list workflow, you can start thinking about more advanced automations. The key is to identify repetitive tasks you’re currently doing manually.
H2: Automating Lead Qualification and CRM Entry
If your website is a source of leads, you can automate the process of getting that information into your Customer Relationship Management (CRM) system.
Sending New Leads Directly to Your CRM
- Trigger: New submission on a lead generation form (e.g., “Request a Quote,” “Download Whitepaper”).
- Action: Create a new lead or contact in your CRM (e.g., HubSpot, Salesforce, Zoho CRM).
- Mapping: Map form fields like Name, Email, Phone, Company, and specific inquiry details to the corresponding fields in your CRM.
- Considerations:
- Duplication: Ensure your CRM’s Zapier integration handles duplicate entries gracefully.
- Lead Scoring: Some CRMs allow you to set up basic lead scoring rules in Zapier based on form data.
- Custom Fields: If you have custom fields in your WordPress form, make sure they can be mapped to custom fields in your CRM.
Tagging or Categorizing Leads
- Trigger: Submission on a specific form, or submission with certain data points.
- Action: Apply a specific tag or category to the new contact in your CRM.
- Example: If someone fills out a form about “Product A,” you can automatically tag them as “Interested in Product A” in your CRM.
H2: Streamlining Customer Support and Internal Notifications
Forms aren’t just for sales; they’re also great for support. You can automate how support requests are handled.
Sending Support Tickets to Your Helpdesk
- Trigger: New submission on a “Support Request” or “Bug Report” form.
- Action: Create a new ticket in your helpdesk software (e.g., Zendesk, Freshdesk, Help Scout).
- Mapping: Map fields like Name, Email, Subject, and the detailed description of the issue to your helpdesk’s ticket fields.
- Considerations:
- Prioritization: Can you set a priority level for tickets based on form input?
- Assigning Tickets: Some helpdesks allow you to assign tickets to specific agents automatically.
Notifying Your Team in Real-Time
- Trigger: A critical form submission occurs (e.g., a high-priority support issue, a sales inquiry from a specific region).
- Action: Send an immediate notification to your team via Slack, Microsoft Teams, or email.
- Content of Notification: Customize the message to include key details from the form submission so your team knows what’s happening at a glance.
- Example: “New High Priority Support Ticket Received! Name: [Name], Issue: [Brief Issue Summary]. Link: [Link to Ticket].”
H2: Managing Event Registrations and Bookings
If you run events or offer bookable services, forms are essential. Zapier can automate much of the backend.
Adding Attendees to Event Management Tools
- Trigger: New submission on an “Event Registration” form.
- Action: Add the registrant to your event management platform (e.g., Eventbrite – though sometimes direct integration exists, or a custom attendee list).
- What to Send: Name, email, company, any selected session choices, etc.
Sending Confirmation Emails and Calendar Invites
- Trigger: Successful event registration or booking submission.
- Action:
- Send a personalized confirmation email with event details.
- Create a calendar event in Google Calendar or Outlook for the registrant (and potentially for you to keep track).
H2: Enhancing Data Management and Reporting
Keeping your data organized and accessible is key for analysis and informed decision-making.
Populating Google Sheets with Form Data
- Trigger: Any new form submission.
- Action: Add a new row to a Google Sheet with all the submitted data.
- Why this is useful:
- Centralized Data: Create a single source of truth for all your form submissions.
- Easy Analysis: Google Sheets is fantastic for sorting, filtering, and basic data analysis.
- Backup: Provides an off-site backup of your form data.
- Mapping: Map each form field to a specific column in your Google Sheet. Ensure your sheet has headers matching your form fields.
Keeping Track of New Customers in a Spreadsheet
- Trigger: Form submission indicating a new customer inquiry or order.
- Action: Add a new row to a “New Customers” Google Sheet.
- What to Include: Customer name, contact details, product/service of interest, date of inquiry.
H2: Troubleshooting and Best Practices for Beginners
| Step | Description |
|---|---|
| Step 1 | Set up a Zapier account |
| Step 2 | Create a new Zap |
| Step 3 | Choose WordPress as the trigger app |
| Step 4 | Connect your WordPress account to Zapier |
| Step 5 | Select the form submission trigger |
| Step 6 | Set up the action app (e.g., Google Sheets, MailChimp) |
| Step 7 | Map the form fields to the action app |
| Step 8 | Test the Zap to ensure it’s working correctly |
Even with a user-friendly tool like Zapier, things can sometimes go awry. Here are some tips to keep your automations running smoothly.
Understanding Your Form Plugin’s Zapier Integration Limits
- Free vs. Paid Plugins: Some free form plugins might have more limited Zapier integration capabilities or require a paid add-on.
- Specific Trigger Events: Not all form plugins will offer every possible trigger. Understand what events your plugin supports.
- Data Formatting: Occasionally, data might come across in a format Zapier doesn’t expect.
Dealing with Mapping Errors
- The “Missing Field” Problem: If you add a new field to your WordPress form after setting up your Zap, you’ll need to go back into Zapier and update the mapping for that specific field.
- Incorrectly Mapped Fields: Double-check that you’ve mapped the correct form field to the correct action app field. A quick test submission is usually the best way to catch this.
- “Required Field” Issues: Ensure that all required fields in your action app are being populated with data from your form.
The Importance of Testing, Testing, and More Testing
- Regular Checks: Don’t just set and forget. Periodically check your Zaps to ensure they’re still running correctly, especially after making updates to your WordPress site or connected apps.
- Use Test Submissions: Make test submissions regularly, especially after any changes.
- Review Zap History: Zapier keeps a history of your task runs. If a Zap fails, check its history for error messages. These are often very helpful for diagnosing problems.
Leveraging Zapier’s Built-in Tools
- Filters: You can add “Filter” steps between your trigger and action to send data only when certain conditions are met. For example, only send a lead to your CRM if their “Industry” field is “Technology.”
- Formatters: Zapier has built-in tools to format data (e.g., change date formats, manipulate text) if needed for your action app.
When to Seek Help
- Zapier Support: Zapier has excellent documentation and support forums.
- App Documentation: Refer to the documentation for your specific WordPress form plugin and the app you’re connecting to.
- Community Forums: WordPress, your form plugin, and your other app might have community forums where you can ask questions.
By automating your WordPress forms with Zapier, you’re not just saving time; you’re making your website work harder for you, freeing you up to focus on what you do best. Start with a simple workflow, get comfortable, and then gradually explore how much more you can automate. The possibilities are genuinely exciting!
FAQs
What is Zapier and how does it work with WordPress forms?
Zapier is a web-based automation tool that allows you to connect your favorite apps, including WordPress forms, and automate workflows. It works by creating “Zaps,” which are automated workflows that connect your apps and services to help you accomplish tasks without any manual effort.
What are some examples of beginner workflows for automating WordPress forms with Zapier?
Some examples of beginner workflows for automating WordPress forms with Zapier include sending form submissions to a Google Sheet, adding form submissions to a mailing list in Mailchimp, creating new contacts in a CRM like HubSpot or Salesforce, and sending form submissions to a project management tool like Trello or Asana.
How can I set up automation for my WordPress forms using Zapier?
To set up automation for your WordPress forms using Zapier, you’ll need to create a Zap and select your WordPress form as the trigger. Then, you’ll choose the action app where you want the data to be sent. Finally, you’ll map the form fields to the corresponding fields in the action app and test the Zap to make sure it’s working correctly.
Are there any limitations to automating WordPress forms with Zapier?
While Zapier offers a wide range of integrations and automation possibilities, there may be limitations depending on the specific apps and services you’re trying to connect. Some apps may have limited functionality or require a premium Zapier plan to access certain features.
What are the benefits of automating WordPress forms with Zapier?
Automating WordPress forms with Zapier can save you time and effort by eliminating manual data entry and repetitive tasks. It can also help you streamline your workflows, improve data accuracy, and integrate your forms with other apps and services to create a more efficient and connected system.


 July 27, 2026