Table of Contents
The HubSpot Integration Addon for WPForms allows you to seamlessly connect your WPForms submissions with HubSpot CRM. Automatically create or update contacts in HubSpot whenever a form is submitted—no manual data entry required.
Requirements #
Before getting started, make sure you have:
- WordPress installed and running
- WPForms (Lite or Pro) installed and activated
- Ultra Addons for WPForms plugin installed and activated
- An active HubSpot account
Installation #
- Log in to your WordPress dashboard.
- Navigate to Plugins → Add New.
- Upload and install the Ultra Addons for WPForms plugin.
- Activate the plugin.
- Ensure WPForms is installed and activated.
Connecting HubSpot with WPForms #
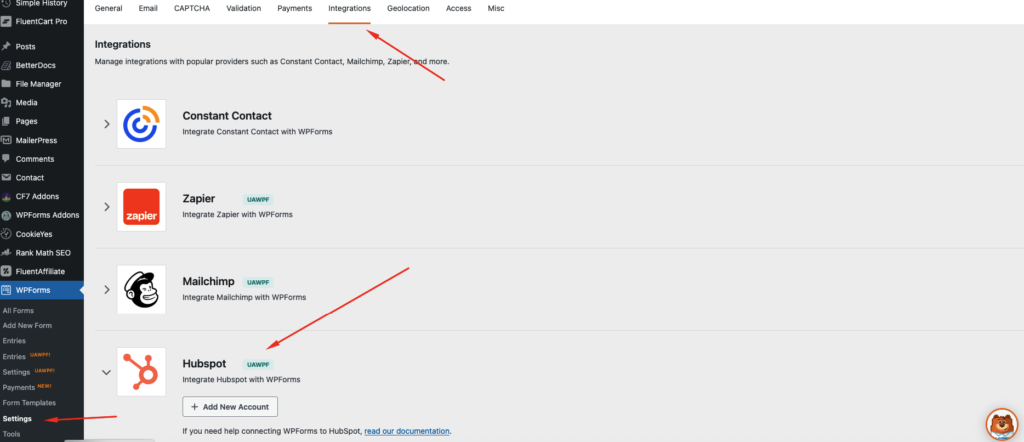
Step 1: Access HubSpot Integration Settings #
- Go to WPForms → Settings → Integrations.
- Find HubSpot Integration.
- Click Connect.
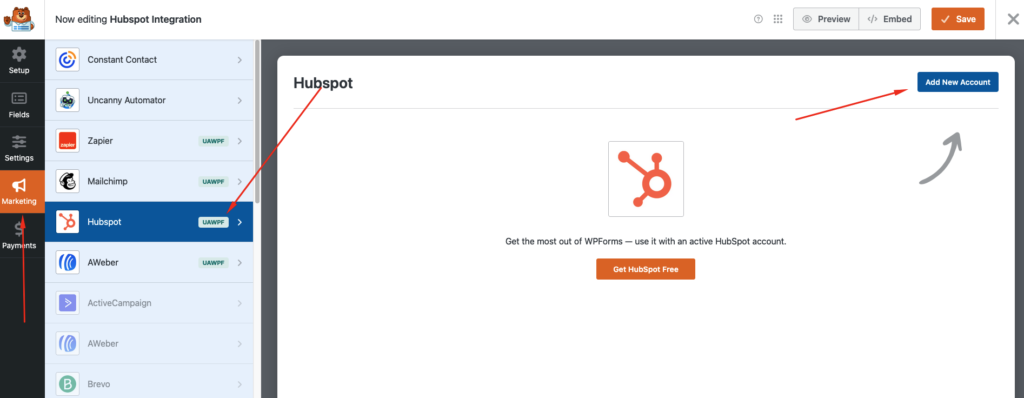
Step 2: Authorize HubSpot #
- Log in to your HubSpot account when prompted.
- Grant the required permissions.
- Once connected, your HubSpot account will appear as Connected.
Setting Up HubSpot Integration in a Form #
Step 1: Enable HubSpot Integration #
- Go to WPForms → All Forms.
- Edit an existing form or create a new one.
- Navigate to Marketing → HubSpot.
- Click Add New Connection.
Step 2: Configure Connection Settings #
- Connection Name
Give your connection a recognizable name. - Select HubSpot Account
Choose the connected HubSpot account. - Action
- Create New Contact
- Update Existing Contact
Step 3: Field Mapping #
Map WPForms fields to HubSpot contact properties:
- Email (required)
- First Name
- Last Name
- Phone Number
- Custom HubSpot Properties
You can map both default and custom fields for full data control.
Conditional Logic (Optional) #
You can choose to send data to HubSpot only when specific conditions are met.
Example:
- Only send contact data if the user selects “Yes” to a newsletter checkbox.
Enable Conditional Logic, set your rules, and save.
Testing the Integration #
- Submit a test entry through your form.
- Log in to HubSpot.
- Go to Contacts.
- Confirm the contact was created or updated successfully.
Supported Features #
- Real-time contact synchronization
- Custom field mapping
- Conditional logic support
- No-code setup
- Multiple form connections
- Secure API-based integration
Troubleshooting #
Contacts not syncing? #
- Ensure HubSpot is properly connected
- Confirm required fields (like email) are mapped
- Check conditional logic rules
- Reauthorize HubSpot if needed