- Quick Video
- Overview
- Key Features
- Getting Started
- Step 1: Install and Activate the Addon
- Step 2: Create Google API Credentials
- 2.1 Create a Google Cloud Project
- 2.2 Enable Google Calendar API
- 2.3 Configure OAuth Consent Screen
- 2.4 Generate Client ID & Secret
- Add Redirect URI:
- Step 3: Connect Google Calendar in WPForms
- Step 4: Create or Edit a Form
- Step 5: Enable Google Calendar Integration
- Settings Configuration
- How It Works
- Troubleshooting
- Best Practices
- Conclusion
Quick Video #
Overview #
The Google Calendar Addon for WPForms allows you to automatically create events in your Google Calendar whenever a form is submitted. It’s perfect for booking forms, appointment scheduling, event registration, or any workflow where submissions need to be reflected in your calendar automatically.
Key Features #
- Automatically create Google Calendar events from WPForms submissions
- Map form fields to event details such as title, date, time, description, location
- Assign events to specific calendars
- Set event reminders and notifications
- Conditional logic support for advanced scheduling workflows
Getting Started #
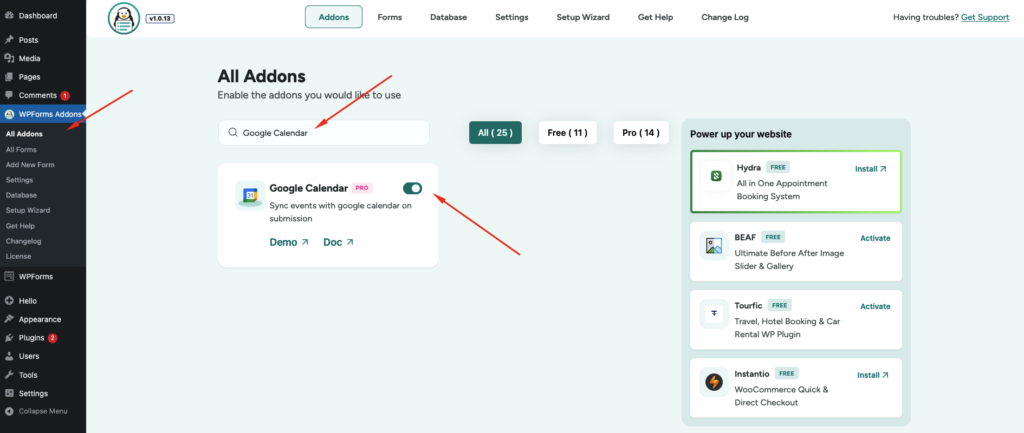
Step 1: Install and Activate the Addon #
- Go to WPForms → Addons
- Install Google Calendar Addon
- Click Activate
Step 2: Create Google API Credentials #
To connect your website with Google Calendar, you need API credentials.
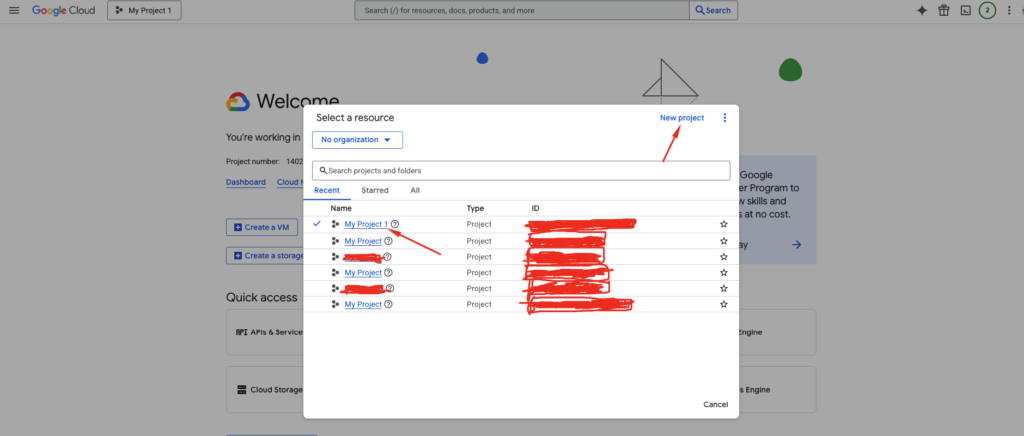
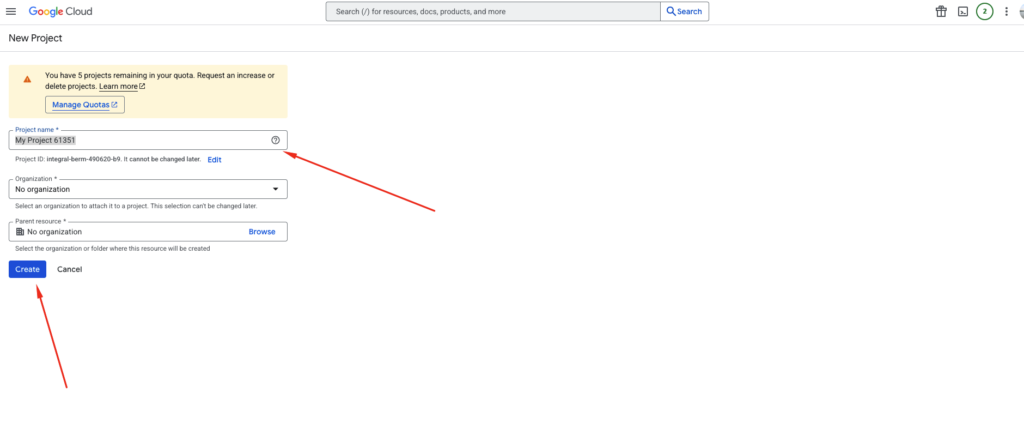
2.1 Create a Google Cloud Project #
- Visit Google Cloud Console
- Click New Project
- Enter project name
- Click Create
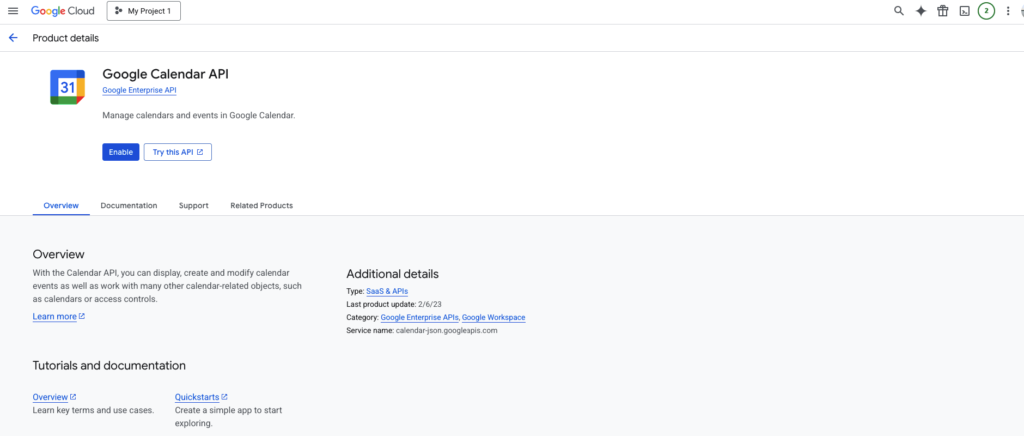
2.2 Enable Google Calendar API #
- Go to APIs & Services → Library
- Search Google Calendar API
- Click Enable
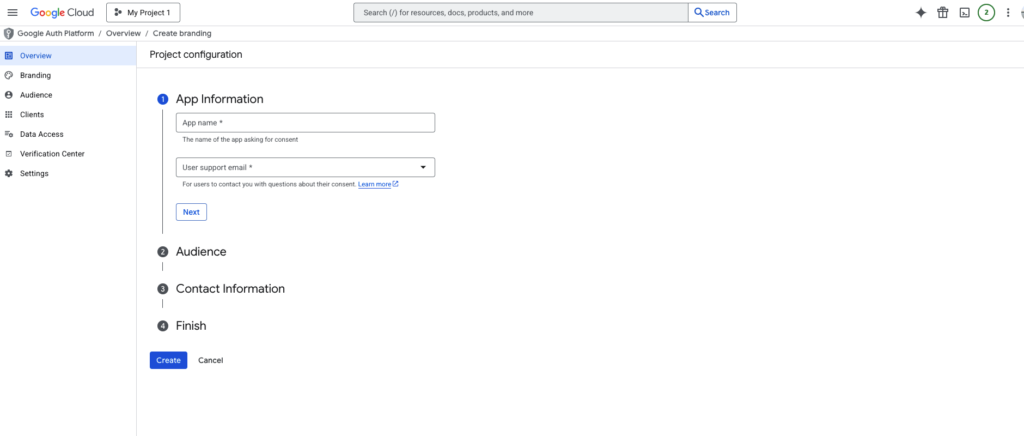
2.3 Configure OAuth Consent Screen #
- Go to OAuth Consent Screen
- Choose External
- Fill:
- App Name
- Save
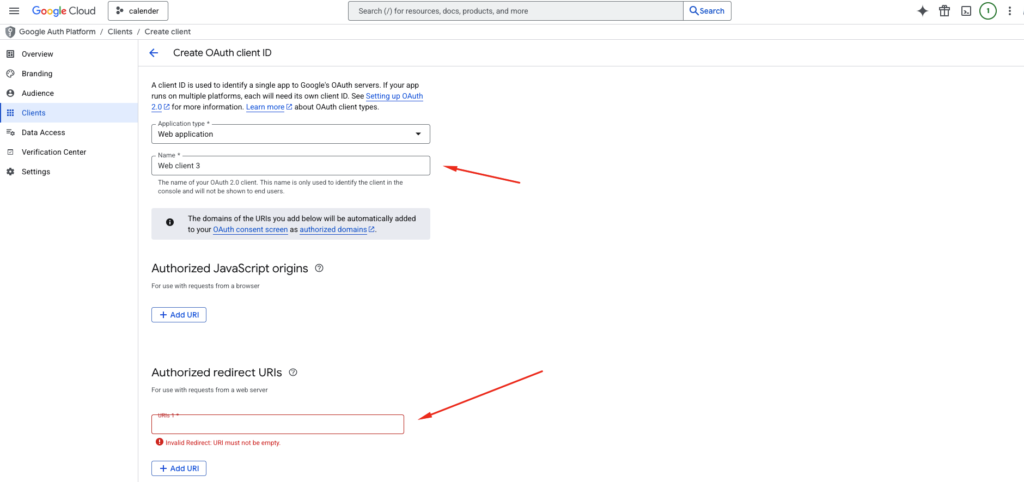
2.4 Generate Client ID & Secret #
- Go to Credentials
- Click Create Credentials → OAuth Client ID
- Select Web Application
Add Redirect URI: #
https://yourwebsite.com/wp-admin/admin.php?page=wpforms-settings&view=integrations
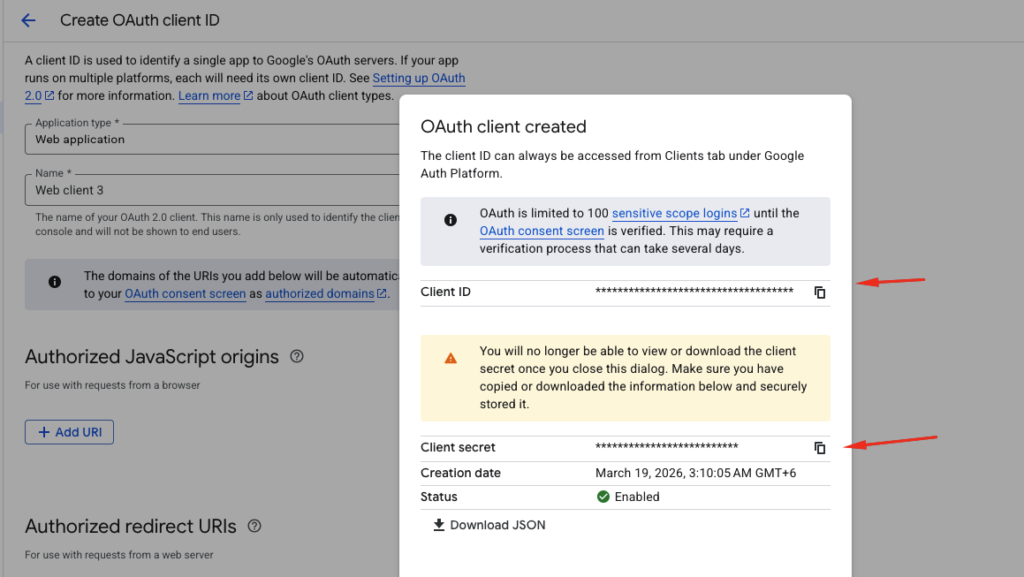
- Click Create
You’ll get:
- Client ID
- Client Secret
Step 3: Connect Google Calendar in WPForms #
- Go to WPForms → Settings → Integrations
- Click Google Calendar
- Enter:
- Client ID
- Client Secret
- Click Connect
- Sign in with your Google account
- Allow permissions
Your account will now be connected.
Step 4: Create or Edit a Form #
- Go to WPForms → Add New
- Add fields such as:
- Event Title
- Start Date & Time
- End Date & Time
- Location
- Description
Step 5: Enable Google Calendar Integration #
- Open your form builder
- Go to Settings → Google Calendar
- Enable Create Event on Submission
Settings Configuration #
Google Account #
Select your connected Google account.
Calendar #
Choose the calendar where events will be created.
Field Mapping #
Map form fields to calendar event data:
- Event Title → Title field
- Start Date & Time → Start field
- End Date & Time → End field
- Description → Notes field
- Location → Address field
Event Status #
Set default status:
- Confirmed
- Tentative
- Cancelled
Timezone #
Ensure your WordPress timezone matches your Google Calendar timezone.
Conditional Logic (Optional) #
Enable conditional rules to control event creation.
Example:
- Only create event if “Book Appointment” is selected
Notifications (Optional) #
- Go to Settings → Notifications
- Configure:
- Email recipients
- Subject
- Message
How It Works #
- User submits a form
- WPForms processes the data
- Addon sends data to Google Calendar
- Event is created automatically
Troubleshooting #
Events Not Creating #
- Check API credentials
- Ensure Google account is connected
- Verify field mapping
- Disable conflicting conditional logic
Authorization Error #
- Reconnect your Google account
- Verify redirect URI
- Ensure API is enabled
Wrong Date/Time #
- Check timezone settings
- Ensure correct fields are mapped
Best Practices #
- Always include date/time fields
- Use clear event titles
- Test before publishing
- Use conditional logic wisely
- Organize calendars by purpose
Conclusion #
The Google Calendar Addon for WPForms simplifies scheduling by automating event creation directly from form submissions.
With proper setup and field mapping, you can create a powerful, fully automated booking and scheduling system in minutes.